How to Add eSIM to iPhone: 2024 Travel Setup Guide
Learn how to add an eSIM to your iPhone step by step, plus activation, APN troubleshooting, and how travel eSIMs compare with local SIMs and roaming.
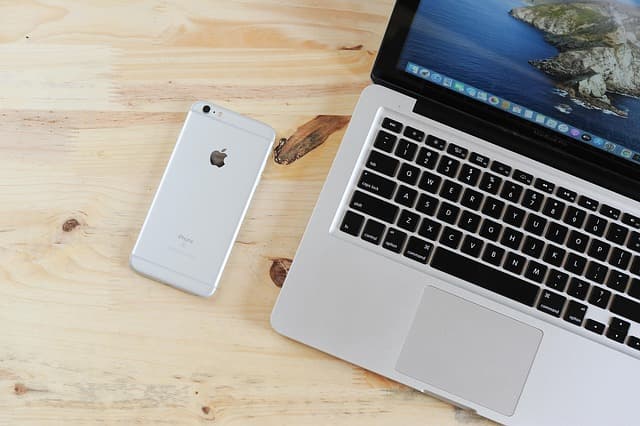
To add an eSIM to an iPhone, go to Settings > Cellular > Add eSIM, then either scan the QR code your provider sent or use a carrier activation link. Most travel eSIMs install in under five minutes without removing your physical SIM. This guide walks through the full process, from checking compatibility to fixing common activation errors.
Key Takeaways
- Quickest install path: Settings > Cellular > Add eSIM, then scan the QR code from your provider email.
- Install before you fly. Set up the eSIM at home on stable Wi-Fi, then switch it on at your destination.
- Your phone must be carrier-unlocked and eSIM-capable to use a travel plan.
- Keep your home SIM active for bank codes and messages while the eSIM handles data.
- Most activation problems are APN or coverage settings, not broken hardware.
What Is an eSIM and Why Travelers Use It
An eSIM (embedded SIM) is a digital SIM chip soldered inside your iPhone. Instead of a plastic card, it stores one or more carrier profiles you download over the internet. That means no SIM tray, no shop queue, and no risk of losing a tiny card in a taxi.
For travelers, the appeal is practical. You can buy a data plan before departure, land with connectivity already active, and keep your primary number live for verification texts. If you are still weighing options, our guide to how eSIMFlux works explains the model in plain terms.
Which iPhones Support eSIM
eSIM support began with the iPhone XS, XS Max, and XR, and continues through every later model. That includes the iPhone 11 through iPhone 16 families and the iPhone SE (2nd generation and later).
One important detail: iPhone 14 and newer models sold in the United States ship without a physical SIM tray at all, so eSIM is the only option there. In other regions, most modern iPhones run a nano-SIM alongside one or more eSIM profiles, letting you use both at once.
- Supported: iPhone XS/XR and all newer models, plus iPhone SE (2nd gen and later).
- Not supported: iPhone X and earlier, which rely on physical SIM cards only.
- Check your model: Settings > General > About, then look for the model name.
Before You Install: A Two-Minute Check
Two things derail most setups: a locked phone and an unstable connection. Confirm both before you start.
- Open Settings > General > About and scroll to Carrier Lock. It should read "No SIM restrictions." If it says locked, contact your original carrier.
- Connect to reliable Wi-Fi. eSIM profiles download over the internet and a dropped connection can leave a half-installed plan.
- Update iOS if an update is pending, since older builds occasionally mishandle new carrier profiles.
- Have your QR code or activation code ready before you begin.
How to Add eSIM to iPhone: Step by Step
Method 1: Scan the QR Code
- Go to Settings > Cellular (on some iOS versions it appears as Mobile Data).
- Tap Add eSIM or Add Cellular Plan.
- Point your camera at the QR code in your provider's email.
- Confirm the plan details when prompted, then label it something memorable like "Travel Data."
- Choose which line handles mobile data versus calls and messages.
For a visual walkthrough that covers the same screens, see our dedicated guide on how to install an eSIM.
Method 2: Use a Carrier Activation Link
Many providers now issue a one-tap activation link instead of a QR code. Tap the link on the iPhone you want to activate, and iOS opens the cellular settings automatically. Some carriers also support in-app installation, where the profile is pushed directly to your device.
Method 3: Manual Entry
If your camera will not read the code, tap Enter Details Manually and type the SM-DP+ address and activation code from your provider. This is slower but reliable when screenshots or printouts blur the QR image.
Activating Your eSIM Abroad
Install the profile at home, but activate it when you arrive. As soon as the eSIM connects to a local network, its validity window typically starts counting down, so switching it on early can burn days you paid for.
On landing, open Settings > Cellular, select your travel eSIM, and toggle on Mobile Data. Then check Mobile Data Network for APN fields, which many travel providers fill in automatically but some require manually.
Popular destinations and their plan options are listed on our eSIM destination pages, covering regions from the United States to Thailand.
eSIM vs Local SIM vs Roaming: What Actually Differs
| Factor | Travel eSIM | Local Physical SIM | Home Carrier Roaming |
|---|---|---|---|
| Setup timing | Before departure, over Wi-Fi | After landing, in person | Automatic |
| Physical handling | None | Swap cards, store home SIM | None |
| Home number status | Stays active alongside eSIM | Usually unavailable | Active |
| Typical pricing model | Fixed data bundles, prepaid | Local prepaid rates, often cheaper for long stays | Daily or per-MB roaming charges |
| Best for | Short trips, multi-country travel | Long stays, heavy local use | Very short trips or emergencies |
There is no universal winner. A week-long multi-country trip usually favors an eSIM, while a three-month stay may justify a local SIM. Roaming tends to be the most expensive for data-heavy use, though it is the simplest to keep running.
Fixing Common eSIM Problems on iPhone
The eSIM Installs but Shows No Signal
Check three settings in order: Mobile Data is toggled on for the correct line, Data Roaming is enabled for that eSIM, and the network selection is set to automatic. Many travel plans require data roaming to be switched on even though you are not roaming in the traditional sense.
Data Works but Is Painfully Slow
Verify you have not hit a daily data cap, then manually select a different local network in Cellular > Network Selection. Also confirm the APN matches your provider's instructions.
The QR Code Will Not Scan
Increase screen brightness if scanning from another device, or use the manual entry option. A blurry or cropped screenshot is the most frequent culprit.
You Need to Remove a Plan
Go to Settings > Cellular, tap the plan, and choose Remove eSIM or Delete eSIM. Note that most travel eSIMs cannot be reinstalled after deletion, so only remove a plan once you are certain you are finished with it.
Practical Checklist Before You Travel
- Confirm your iPhone model supports eSIM (XS/XR or newer).
- Verify Carrier Lock says "No SIM restrictions."
- Buy and install your travel eSIM while on home Wi-Fi.
- Label the plan clearly, for example "Japan Data."
- Set your travel eSIM as the line for mobile data.
- Keep your primary SIM active for calls and verification texts.
- Enable data roaming on the travel eSIM only.
- Screenshot the QR code and APN settings as a backup.
- Switch the eSIM on only after landing.
Choosing a Plan: What to Compare
Plan names differ, but the underlying questions are consistent. Compare the countries covered, the total data allowance, the validity period, whether hotspot tethering is permitted, and whether the plan is data-only or includes a phone number.
For a data-only traveler, hotspot support and fair usage terms usually matter more than the headline price. When you are ready, you can browse all eSIM plans to compare coverage and bundle sizes side by side.
FAQ
Can I add an eSIM to my iPhone without going to a store?
Yes. Almost all eSIM profiles install entirely online through Settings > Cellular > Add eSIM. You only need internet access, a compatible unlocked iPhone, and the QR code or activation details from your provider.
How many eSIMs can an iPhone store?
Most modern iPhones can store multiple eSIM profiles, though only a limited number can be active at once, typically two lines. You can keep a travel eSIM and your home line enabled simultaneously and assign data to just one.
Do I need to remove my physical SIM to use an eSIM?
No. On iPhones with a SIM tray, you can keep your physical SIM and run an eSIM alongside it. On US iPhone 14 and newer models, there is no tray, so the eSIM is your only line.
Why is my travel eSIM not connecting after landing?
The most common causes are data roaming switched off for that line, the wrong line selected for mobile data, or an incorrect APN. Check those three settings before assuming the plan itself has failed.
Should I install my eSIM before or after I arrive?
Install before departure so any download issues happen on reliable Wi-Fi, but activate the line after landing. Many plans start their validity countdown on first network connection.
Does an eSIM work for calls and texts, or only data?
It depends on the plan. Many travel eSIMs are data-only, which is fine if you use messaging apps. If you need a local number for calls, choose a plan that explicitly includes voice services.
Travel connected
Choose your destination and compare eSIM plans
Get digital delivery, transparent validity, and plan details before you travel.